Basic usage
In this section you will learn how to start sending records (events) to Moonlogs.
Prerequisites
It is highly recommended that you use an off-the-shelf SDK to interact with Moonlogs. Moonlogs currently provides the following SDKs:
TIP
If your language is not represented in the list of ready SDKs - you can always fill in a new issue and we will add it!
Otherwise, you can use the specification described by Swagger if there is no SDK for your language yet or you want to work with the API directly:
Basic steps
At its core, in order to start submitting records to Moonlogs you need:
- Create an API token to access the API
- Install the SDK for your language or work with the API directly
- Create domain schemas
- Send records
1. Create an API token
In order to create a new API token, you need to go to Moonlogs' Web interface and:
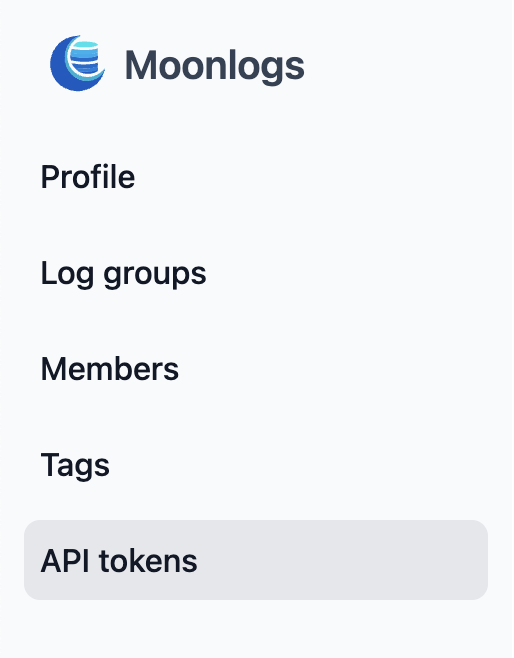
- Click the
API tokentab on the left:
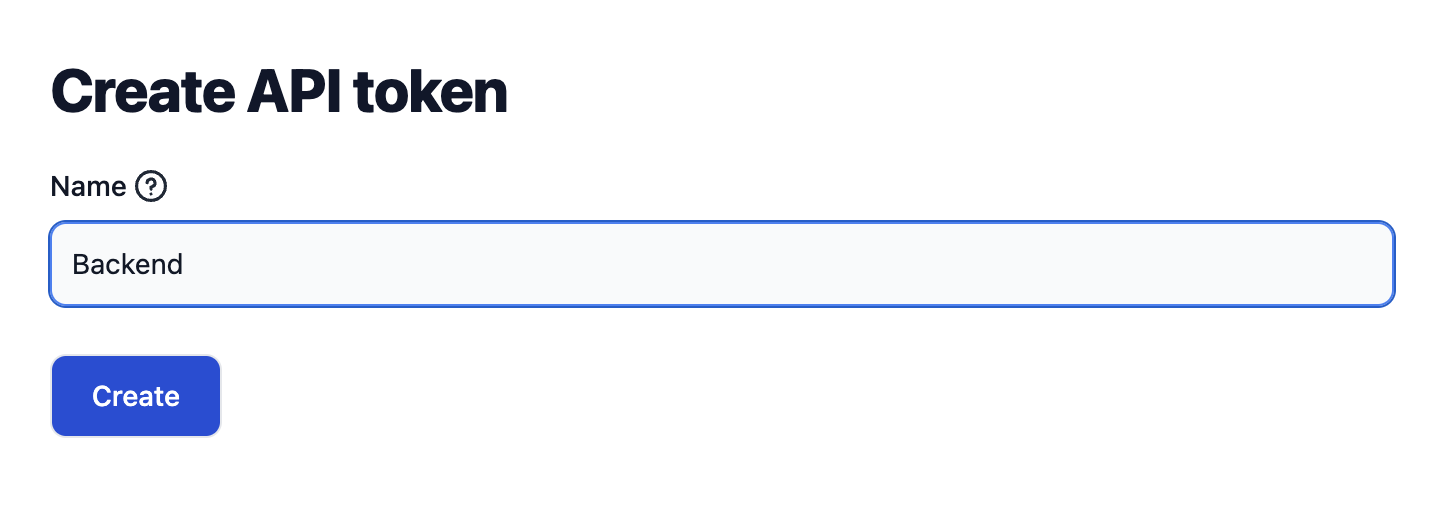
- Then click the plus icon right to the
API tokensheader:

- Fill out the API token name and press
Createbutton:
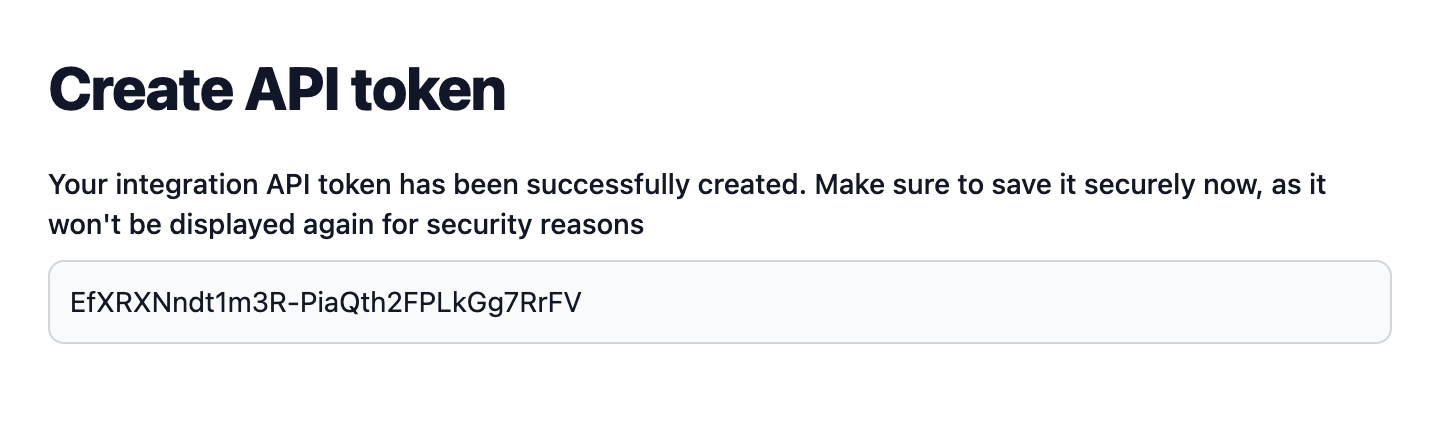
- After generating the API token, make sure to copy it immediately, as it won't be shown again:
2. Install SDK or work with the API directly
It is highly recommended that you use ready SDK to interact with Moonlogs:
You can follow the link of your language for a description of the next steps, or continue reading on for a general description of working with a raw API.
3. Create domain schemas
Now you need to create a schema to which you will send records. A schema is a kind of container for aggregating records of a specific business scenario or functional block.
Examples of schemas could include: Online payments, User change history, SMS authentication, Export reports by email, etc.
Each schema must consist of the following attributes:
name: textual identifier for the schema used in most operations. It must be specified in Latin, in lowercase, and with underscores as separators.title: human-readable name of the schema in the web interface.description: human-readable description of the schema details in the web interface.retention_days: the number of days during which logs will be available after their creation. After the specified number of days elapses, the logs will be deleted. To set an infinite lifespan, specify 0 or leave the field empty.fields: an array of fields by which log grouping will occur. Each field consists of:title: human-readable name of the field in the web interface for log filtering.name: textual identifier for the field. It must be specified in Latin, in lowercase, and with underscores as separators.
To create the first schema, you need to send the following request:
curl --location --request POST '<host:port>/api/schemas' \
--header 'Content-Type: application/json' \
--header 'Authorization: Bearer <api_token>' \
--data '{
    "title": "Online Payments",
    "name": "online_payments",
    "description": "History of online payments",
    "fields": [
        {
            "title": "Organization ID",
            "name": "organization_id"
        },
        {
            "title": "Customer ID",
            "name": "customer ID"
        },
        {
            "title": "Payment ID",
            "name": "payment_id"
        }
    ]
}'
INFO
Please replace <host:port> with host:port Moonlogs is running on and <api_token> with the API token you generated in step one.
In response, you should receive something like this:
{
    "code": 200,
    "success": true,
    "error": "",
    "data": {
        "id": 1,
        "title": "Online Payments",
        "description": "History of online payments",
        "name": "online_payments",
        "fields": [
            {
                "title": "Organization ID",
                "name": "organization_id"
            },
            {
                "title": "Customer ID",
                "name": "customer_id"
            },
            {
                "title": "Payment ID",
                "name": "payment_id"
            }
        ],
        "kinds": null
    },
    "meta": {
        "page": 0,
        "count": 0,
        "pages": 0
    }
}
This means that the schema was successfully created and assigned an ID.
TIP
If you send a duplicate request to create a schema with an existing name, then instead of creating a new schema, the existing one will be updated. This simplifies the creation/update of schemas when starting your application.
4. Send records
After creating the schema, you can send your first record to this schema. To do this, you need to prepare the record payload, which must consist of the following attributes:
schema_name: the textual identifier of the existing schema (schema.name)text: text of the record that will be shown in Web UIquery: a set of parameters from the schema fields (schema.fields[]). This set determines the grouping of records.
For example, the basic request to create an record with simple payload would look like the following:
curl --location --request POST '<host:port>/api/logs' \
--header 'Content-Type: application/json' \
--header 'Authorization: Bearer <api_token>' \
--data '{
    "schema_name": "online_payments",
    "text": "The customer paid $5 for a subscription to the «Basic» tariff",
    "query": {
        "organization_id": 34,
        "customer_id": 891,
        "payment_id": 217596
    }
}'
In response, you should receive something like this:
{
    "code": 200,
    "success": true,
    "error": "",
    "data": {
        "id": 1,
        "text": "The customer paid $5 for a subscription to the «Basic» tariff",
        "created_at": "2024-03-31T19:16:45+03:00",
        "schema_name": "online_payments",
        "schema_id": 1,
        "query": {
            "customer_id": "891",
            "organization_id": "34",
            "payment_id": "217596"
        },
        "group_hash": "7792753873920415191",
        "level": "Info"
    },
    "meta": {
        "page": 0,
        "count": 0,
        "pages": 0
    }
}
This means that the record was successfully created and assigned an ID.
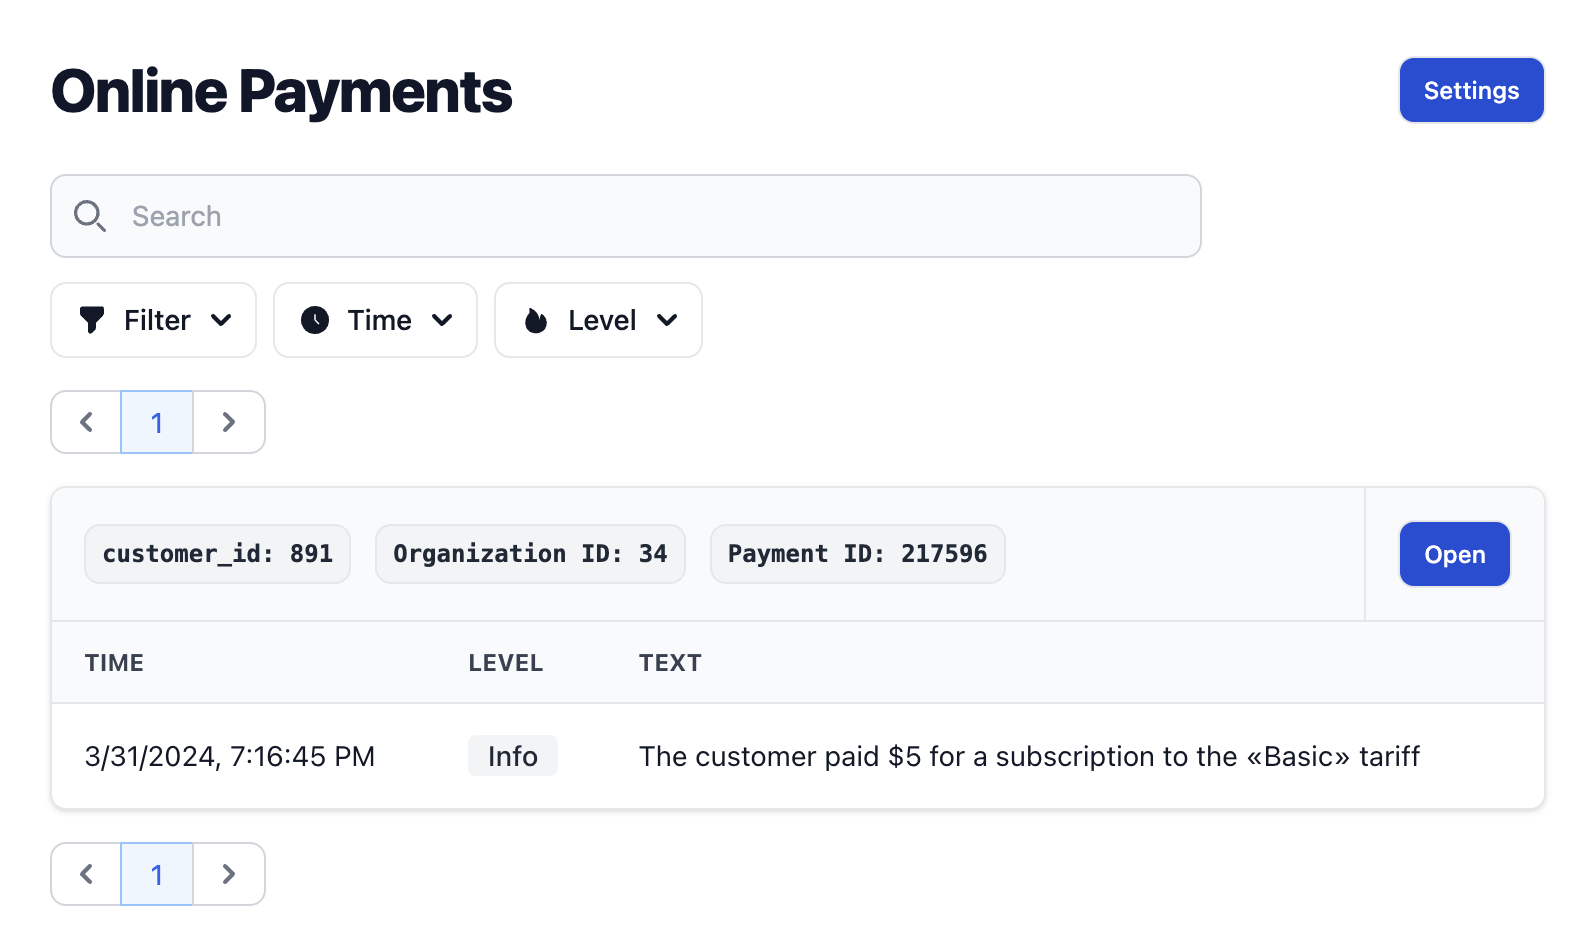
Verify the presence of the created record in the web interface
Now you can verify that the record was succesfully created by checking it in Web UI:
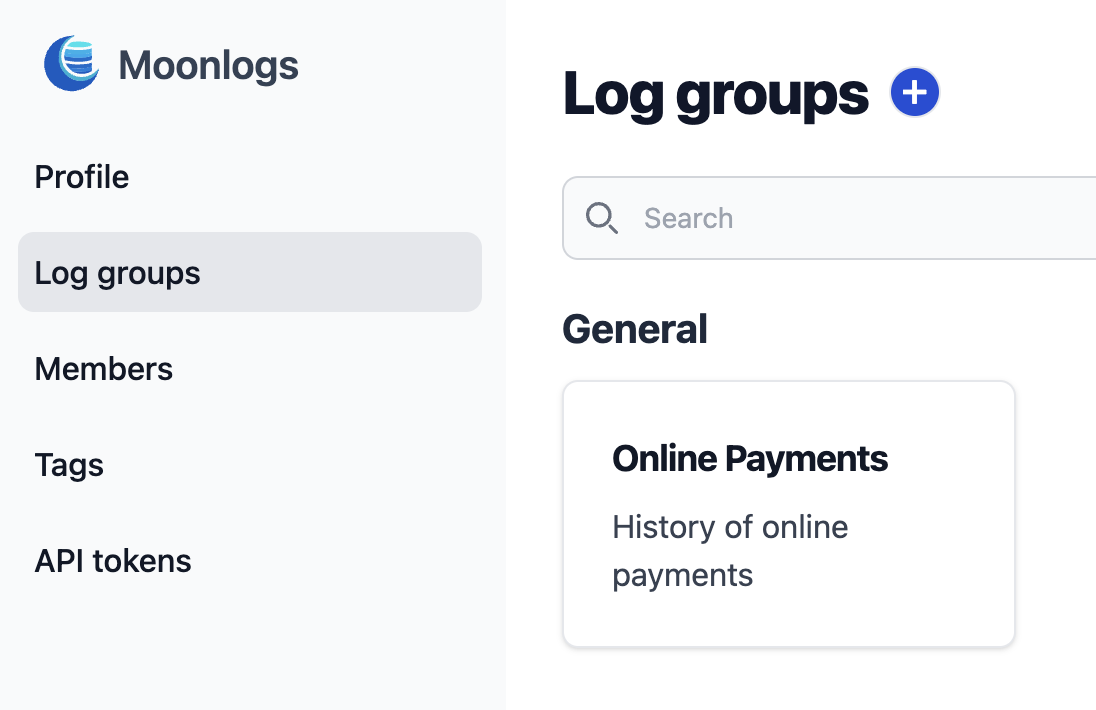
- Click the
Log groupstab on the left and click onOnline Paymentscard:
- Here you can see the record was successfully created with all the data we specified: text and query fields:
Test the grouping
Now try to send another record with different set of query fields, for example:
curl --location --request POST '<host:port>/api/logs' \
--header 'Content-Type: application/json' \
--header 'Authorization: Bearer <api_token>' \
--data '{
    "schema_name": "online_payment",
    "text": "The customer paid $25 for a subscription to the «Essential» tariff",
    "query": {
        "organization_id": 35,
        "customer_id": 540,
        "payment_id": 217597
    }
}'
After reloading the page, you will see that the second record was successfully created. But more importantly, it was assigned to a different record group based on its query attributes:

As a result, you have learned how to create records in Moonlogs in the most basic form.
What's next?
For a more detailed description to schema and record formats, please refer to our Entities definitions
Check out Introduction to the Web UI section to familiarize yourself with the Moonlogs built-in web-interface